The transition looks good! The game looks already almost finished (well, except the missing clothes  ) but, of course, under the hood there are a lot to do.
In my eye the green grass is a bit too bright or saturated.
Btw. It would be nice addition to PokittoLib to have a XML reader (and a JSON reader).
Actually the xml files are compiled into the final binary format that gets placed in the pak file.
1 Like
About the Matti cameo: This “Matti” animation is 18 pixels high. If I add outlines it will be 20 pixels. Might still be too small thought.

4 Likes
If it can feel you better, I’m more interested in this project then the pinball one 
And to be fair, this project really boost the community. Thanks to your post about the common development issues and your perseverance, it’s a great and precious point of view to encourage everyone to keep on and finish something.
Or at least enjoy the experience having fun doing it 
5 Likes
Got my xml data file setup for the map data and the map events. Took me about 10 minutes to finish exporting the other two floors of the inn and setting up the necessary teleport events. I like this xml format since it’ll make it far easier to create the events manually. Eventually I will probably put together a map editor, but I’m hoping to get all of Chaper 1 done first so everything is more solidified.
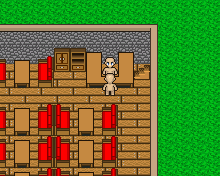
One humorous dilemma I encountered though had to do with the way I had setup the counter in the inn for the innkeeper to stand behind.
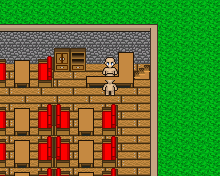
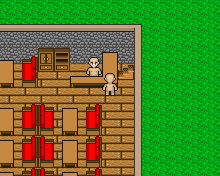
Clearly the counter-top should be rendered below the player’s head, but in order for it to be above the sprite for the innkeeper (currently just using the same template sprite as a placeholder) it needed to be on the foreground layer. However, placing it on the foreground causes it to be drawn above the player sprite (it’s how the player walks below the roofs of the buildings for example).
Luckily I remembered that sometimes clever problems require simple solutions. For this one I just copied the counter tile graphics over the top of the innkeeper sprite’s feet (since it’s actually a separate graphic from the player sprite). Then just erased that part from the map and now it looks the way I wanted it.
Slowly, but surely, getting the events in place for the maps I have. Still need to make the shop map, player’s home, 4 NPC homes, cellar, and cavern (which requires at least one new tileset).
Can’t wait to get all of Chapter 1 done (including giving the characters some clothes  ) and then release the initial demo of this game.
8 Likes
Good work!
Not sure if I understood this right, but that isn’t a generic solution, is it? You not copying gfx at run time? Would it work if the counter was able to move? Isn’t that problem in many other places too, like near flowers or small trees, if there are two characters around an object?
For the sake of trivia:
(Though this may give you some ideas about how to go about achieving a more general solution…)
The way most 2D Pokemon games solved this dilema was to split the offending tile in two and put the upper tile on the foreground and the lower tile on the background, which is the main reason why nearly all trees and some signs are two tiles tall
All tiles had both an upper layer and a lower layer (though not all tiles used both layers).
For ‘foreground’ tiles the upper layer would be above the player and the lower layer below,
whereas for ‘background’ tiles both layers would be below the player.
To complicate matters further, there was a ‘height’ system combined with the ‘movement permission’ system and some tiles would switch between being ‘foreground’ and ‘background’ depending on the height of an NPC.
At its most complex, the player could be stood on top of a bridge with an NPC underneath the bridge and the layering would all work as expected - lower layer, NPC, upper layer, player.
It was very effective considering the height/movement permission only took one byte per tile (though it could be fit into a single nibble if the number of heights were more limited).
Incidentally the GBA on which this was all achieved also happens to have an ARM processor.
5 Likes
Actually that’s how this is being done as well. I have 4 lineFillers (layers) in the order: backgroundTiles, sprites, foregroundTiles, UI. The difficulty is that the player’s head is on top of the counter which should be on top of the NPC sprite which should be on top of the background tiles. Normally I use 3 tile layers with the bottom half of the sprite being between layers 1 and 2 and the top half being between layers 2 and 3. This makes it so the top half of a sprite is always above the bottom half of all other sprites but allows for tiles to be below everything, between the two, or above everything. Unfortunately do to memory/cpu limitations I didn’t want to add a third layer to the mix.
You’ll be happy to know the main character at least now has clothes (NPC’s on the other hand).
I started with the overall shape of the template:

But his head is way too “triangular” so I rounded it out a bit more:

Looking better, but the head and neck blend together too much.

That’s looking better already, then I just added some final shading:

Here’s a side-by-side comparison from start to finish (left to right):
![]()
With the forward facing scheme out of the way now it’s time to animate it:

His torso looks like it’s shrinking each step, so to fix that:

Now it doesn’t look like he’s somehow getting skinnier by taking a step forward (wouldn’t that be nice ), but the torso still looks like it’s twisting:

That looks a lot better, I tried having the vest appear to flap a bit as he walked but without much room for detail it just looked like he was twisting his body with each step.
Now to work on the backside (I struggled with the hair quite a bit, but managed to pull it off):

I didn’t like how high up the vest was so I lowered it by one pixel:

Then did the same steps as before for the animation:

Overall it’s really looking nice now. Here’s the final sprite sheet with all frames and directions:
![]()
And here’s what it looks like in the game:
I’d say the main character is looking mighty handsome now.
Still have a bit to go (NPC sprites, more maps, more tiles, more battle backgrounds, an enemy and boss, and some events) before Chapter 1 is done. However, things are progressing at a decently steady pace so it shouldn’t be too much longer now (hopefully).
8 Likes
Needs more beard!
2 Likes
The character animation looks pretty nice! Maybe a different colored shirt would make it more distinct from the surroundings.
Btw. Do you need Matti for the chapter 1 already?
2 Likes
Matti won’t actually make an appearance until later in the game. The secret area isn’t accessible in chapter 1.
2 Likes
Always more beard.
That comes with age, I did mention there’ll be multiple versions of the main character sprite as the game progresses .
5 Likes
Realistic beard-growing simulation confirmed. One more reason to get hyped about this game. 
3 Likes
Been a bit since I’ve been able to get much done on this. Today I continued my efforts to push towards Chapter 1 being complete. The engine is stable enough (theoretically) that I can start from the beginning and create each piece of artwork starting from the very beginning of Chapter 1 (which starts in your home). So I’ve got the character’s wife’s sprite done.
First iteration was nice, tried a few different shades of green to have green eyes but in the end I went with brown since the green was contrasting too much (especially on HW). Also added some rosy cheeks for added effect.


I drew up the map for the player’s house:
Then added the dialog with the wife. If you leave the house before talking to her she’ll give you the same message before leaving but only the first time (she’ll say the same thing but won’t interrupt you before leaving the house again).
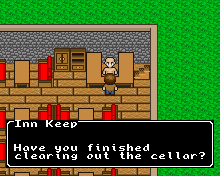
When you get to the inn the inn keeper (I still need to do his sprite) will have an optional message for you before entering the cellar.
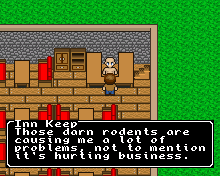
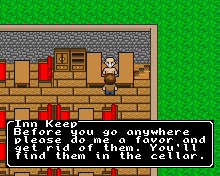
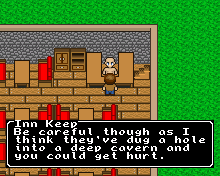
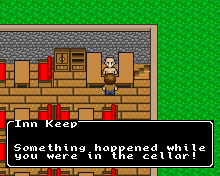
Once you’ve spoken to him at least once he’ll repeat the following until the cellar has been cleared:
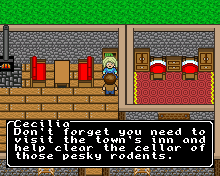
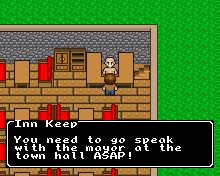
Once you’ve cleared the cellar (TODO) he’ll say this until you talk to the mayor:
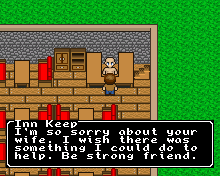
After talking to the mayor he’ll simply repeat the following:
This is what’s left for Chapter 1:
- Inn Keeper sprite
- One or two guests at the inn
- Shop keeper sprite
- Shop system
- Mayor sprite
- Few random townsfolk sprites
- Cellar tileset
- Cavern tileset
- Cavern battle background
- Rat enemy
- Rat’s nest boss
- Small chest sprite which contains basic items available at the shops (refills upon exiting to the world map).
- Large chest sprite which contain unique items
- Few more maps
- Shop map (2 floors)
- 4 NPC houses (single story with subtle variation between each house, nothing fancy).
- Cellar map (same size as inn and leads to the caverns underneath the town).
- Cavern map (medium sized cavern with a few nooks and crannies serving as the tutorial area for battles).
- Basic title screen (most likely just text with new game / load game options)
- In game menu system for viewing stats, skills, spells, and using items/skills.
Clearly there’s still a bit of work to do but a lot of the bigger ones won’t need to be done for each chapter. Once the core system is more finalized it’ll just be a matter of creating content.
6 Likes
Didn’t have much time today with some errands I had to run, but I was able to throw together the inn keeper’s sprite really quick.
This is after spending only about 20 minutes on it (due to limitations on the map layout the inn keeper sprite has the top half of the counter baked into the sprite):

Here’s the final rendition after touching up the shading a bit.

I did a quick comparison of the sprites against the original template I’m using as a reference point and it’s really neat seeing the transformation.
What’s really cool is I’m getting faster and better at the pixel art the more I do it. The sprite for Cecilia (the main character’s wife) took me a little over an hour, but the inn keeper (haven’t decided on a name yet) took only about 25 minutes.
7 Likes
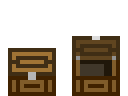
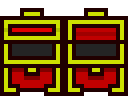
Today I started work on the two chest sprites. The idea is to have a small chest (looking like a small box) that contains basic items and gets restocked whenever the player enters the world map and large chests (more ornate design) that contain unique items (such as equipment).
The chests went through several iterations to get the overall shape and shading just right as well as the contrast to the regular tiles.
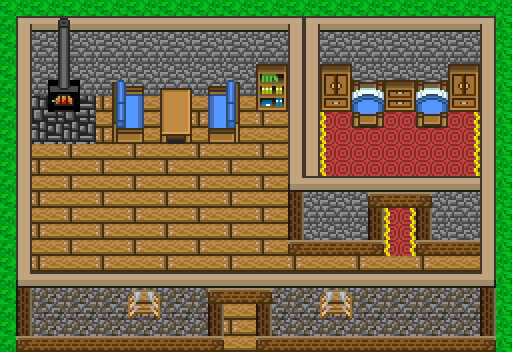
Here’s the chest against the interior tileset:

It didn’t stand out well against the surroundings (though the small chest should blend in with the furniture at least a little bit):
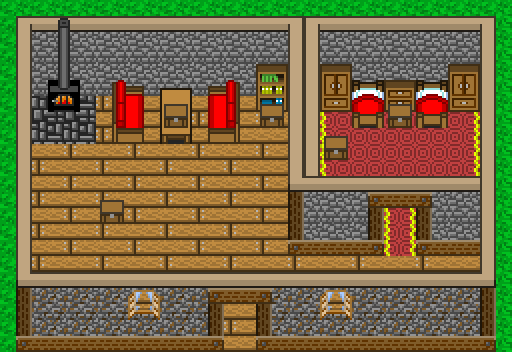
Discovered that I had forgotten to lighten the table border and headboard of the bed to match the rest of the furniture so it looks a little off.
Tried doing some basic shading:

The highlights were nice but they lacked consistency with everything else so I tried a simple pattern:
Still wasn’t quite doing it for me so I did a different highlight:
Fixed the open sprite to look better:
Then started the large chests:

Silly me forgot to have part of the latch remain on the base when opened (also dropped the size of the lid a bit):

Next tried changing the style of the interior of the lid to not have the gold trim all the way around:
Then experimented with a partially open design since the fully open one didn’t look right unless you see the animation of it opening:

This was looking a lot better but I saved the other sprites just in case and discovered I can have the chest closed at first. Then when the player opens it it switches to the fully open version and after the dialog it switches to the partially open state. From that point on (until refilled) it’ll stay in the partially open state:
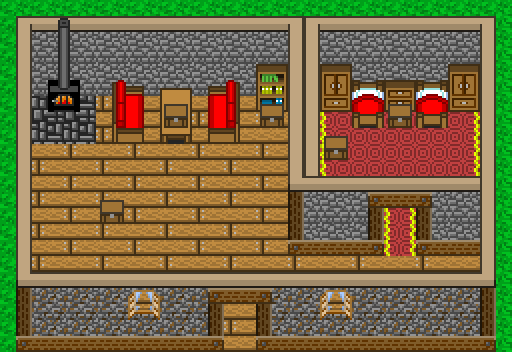
Realized that with this coloring the beds are a bit too vibrant and look like they should do something (they don’t), so I changed their colors a bit along with the seating:
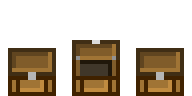
Finally fixed the highlighting a bit further so it has a more vertical lighting. Also moved the large chests up 1 pixel and added a dithered shadow effect beneath them:
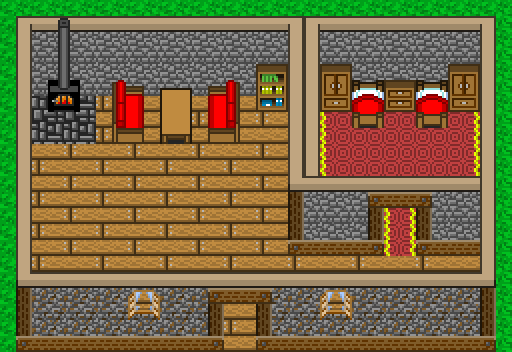
Here’s what they look like on a map:
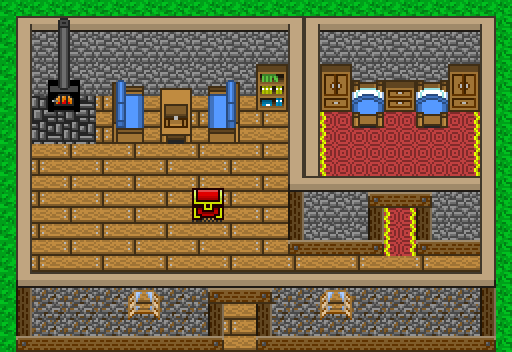
That’s all for now. Will get more done after the holiday.
9 Likes
That’s out if this world… unbelievable
1 Like
Today was entirely focused on internal code tweaks to achieve max user experience. In this case I forgot about the quirk of the Pokitto when accessing the SD it’ll warble the speaker a bit (if music is playing it becomes a bit choppy).
The way my event system worked is it read the data from SD byte for byte as it was needed. If an event such as waitButtons occurs (there’s other events that read several bytes and possibly rewind) which pauses the event execution until a user presses a button (without pausing the core game loop) it’ll sit there reading that same byte (the event system simply rewinds itself if the intent is to execute that same event again during the next processing phase). This would cause the warble effect making the music choppy when a dialog is open and waiting for the user to press a button.
To remedy this I created a 512 byte event buffer that would buffer up to 512 bytes of the event at a time. When an event rewinds it simply rewinds the pointer into the buffer (if that ends up below the start of the buffer than it rewinds the pos in the event file and reads into the buffer). When reading the next byte it checks if the pos is beyond the 512 byte buffer in which case it buffers the next chunk of event data.
To the non-coding (and non-SD experts) this simply eliminates the warble effect when executing events.
I’m pushing to try and get Chapter 01 done by the end of the week (don’t know if that’s realistic or not, but I’m going to get as much done as possible) because I’ve got relatives coming up this weekend that would love to try it if it’s ready. They’ll be here through the following weekend though so the deadline might get extended by a week if time is available.
5 Likes