Or is it compatible with this 10-pin 2x5 socket ?
https://www.adafruit.com/product/1675
I am asking because there is a mini j-link debugger compatible with cortex m processors (and the price is great !!!).
https://www.adafruit.com/product/3571
1 Like
Wow! That is a great deal! Thanks for the tip.
@Hanski @HomineLudens @spinal @eried and everyone even remotely interested in debugging: that is the real deal at a throwaway price. I suggest you get it right away.
You also need one of those standard 10pin SWD connectors (that you see on the picture of the J-Link mini) to solder on the board
1 Like
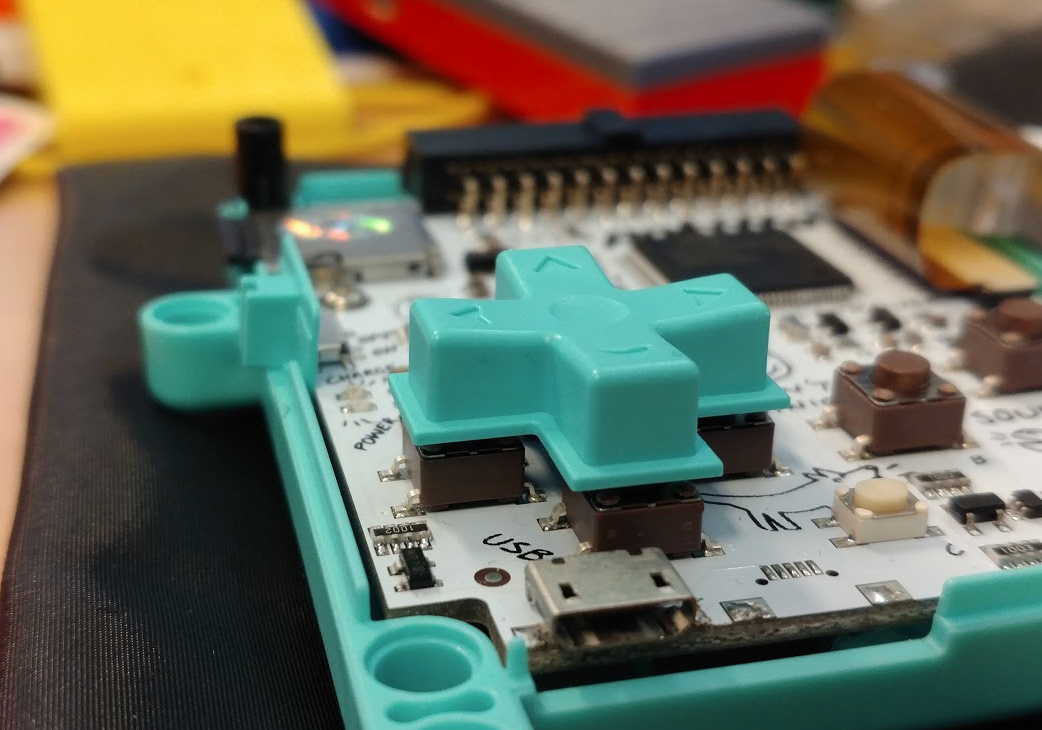
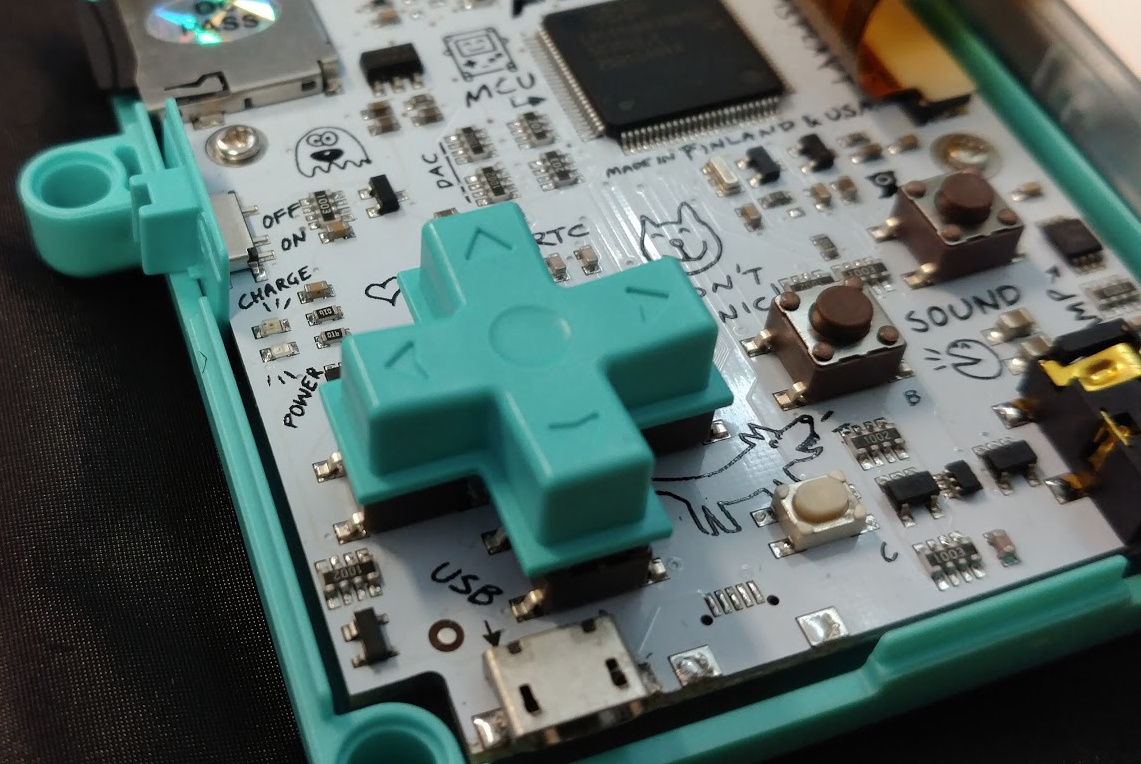
I just tested some controllers,
The following ones CAN press all directions at once
Nintendo Switch Pro controller
The following ones CANT press all directions at once
NES
SNES
N64
XBox 360
PS3
PS4
Wii Classic Controller
Wii Remote
Just because there is a little movement by pressing the whole dpad, does not mean that all directions will press at once. In all except the Switch controller, even with the dpad pressed from the middle, they will still rock from side to side.
2 Likes
Whether they register the button presses or not is another issue.
Perhaps I will add a small stalk to prevent a flat middle press in the future. Its not super hard to do, just costs money (to the tune of 500-1k)
If most people don’t mind, then I wouldn’t bother. It seems an expensive job just to a a lump of plastic.
i got a Logitech controller for pc that has a 5 direction way switch for the pad
(thats usually what there called wen you can press all 4 buttons down)
also since we got it might as well use it see it as the L3 button on most controllers
1 Like
I have steam controller and it’s D-Pad have only one button 
1 Like
Very good  I had to get my steam controller to see what you were talking about!
1 Like
Once I have a pokitto, or when the 3d files for the case and buttons are released I can experiment with 3d printing one with a ball or stalk on the bottom. Having an alternative dpad be 3d printable would be at least some solution for the people who really need it.
(I actually have some cheap NES and SNES controller clones. I can open them up and see how the d-pad looks on them).
…after all, pokitto is a DIY console, so DIY solutions would be right up its alley 
I think getting the tactile feedback that gamers are used is an extremely hard task. I tried with a center pivot but it does not make the trick
It is probably a thing between the spot where the dpad and case met.
4 Likes
It is tricky for me to solve without having the hardware, but you can try some of my ideas:
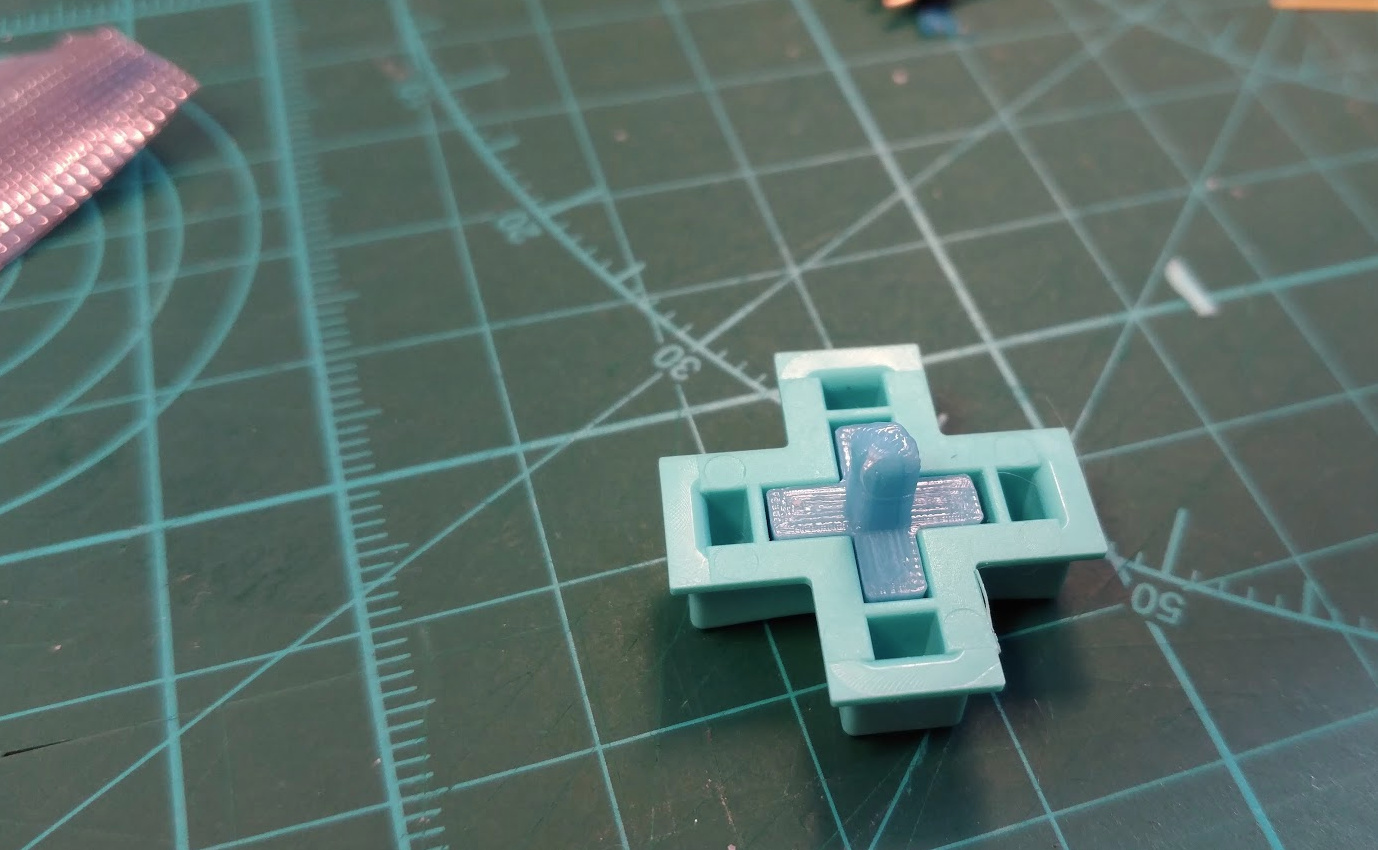
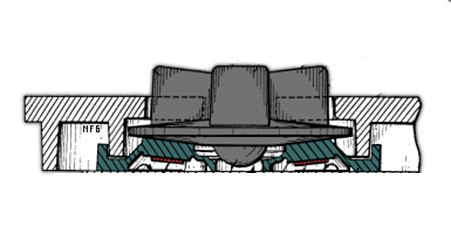
- having a really pronounced ball/halfsphere at the end of the stalk (so when pressed, the dpad will never sit flat on pcb)
- having the cross part that goes into the dpad curved on top (again so the dpad does not sit flat on the cross) - this would require some finetuning to keep the dpad from missing clicks on lighter presses.
- You can try both at the same time, but that might make the dpad feel really wobbly)
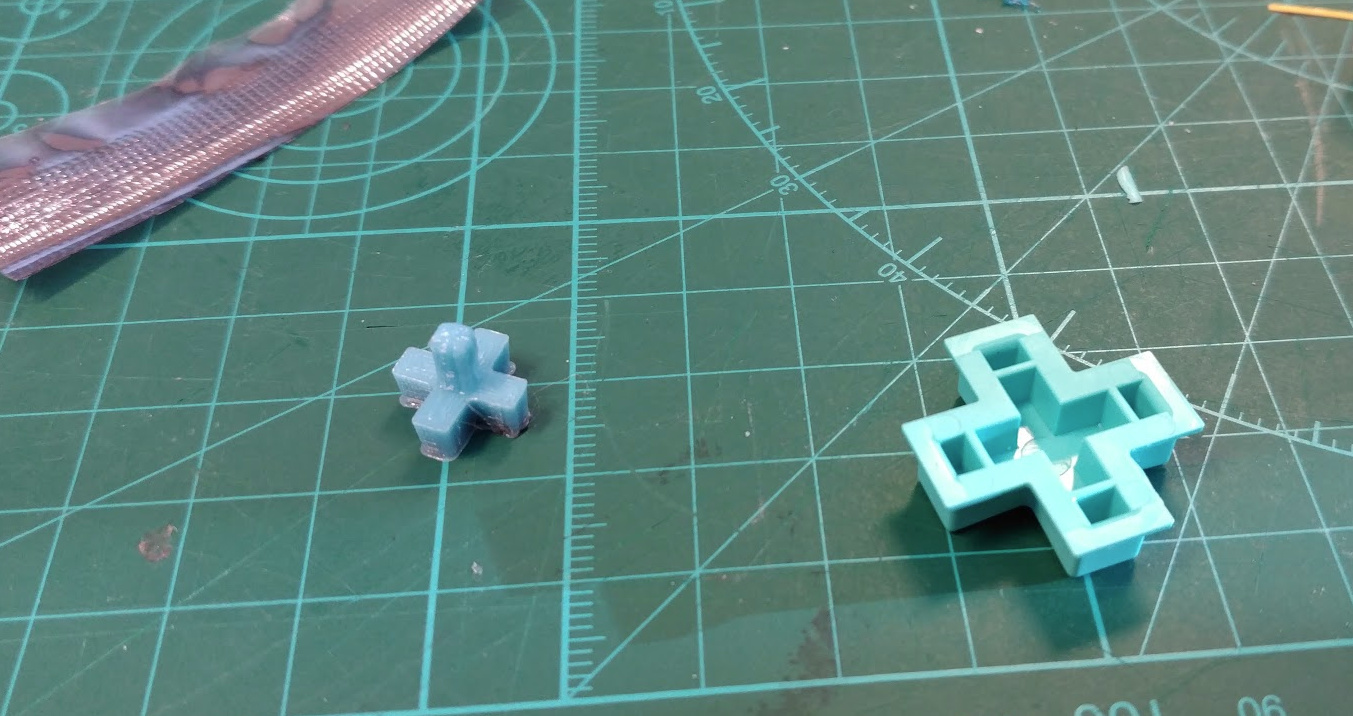
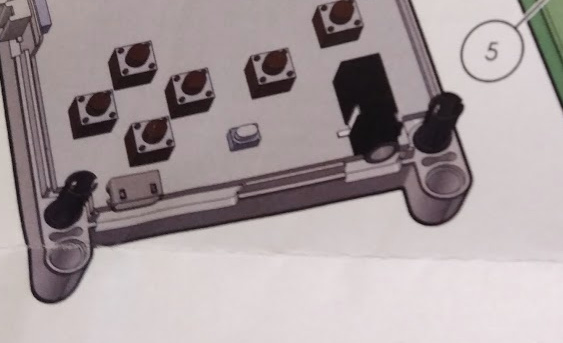
@eried could you get me a picture of the pcb without the dpad and then dpad sitting on it in the correct place? I am sure this is solvable
neat heres more stuff to try out
looking at some diagrams you can look at where the pivot point should be
and have 2 parts a ball socket on the pcb and something you have already
also if its to lose have you tried something like a spring?
2 Likes
Thanks @eried !
This is what I would do:
- Make a half-sphere basically filling the gap between buttons, leave maybe 1-2mm on each side to allow for smooth movement. Depending on the filament you might need to tweak the radius of the sphere to allow for plastic expanding/shrinking after printing.
- From the half-sphere, make a rod to the dpad. You want the rod to be a little longer than how the dpad rests normally. This way the dpad will be pushed up a bit, but it will still be held in place by the case.
- If you have button misfires, you might want to fill the ends of the dpad solid, so you have a bigger surface available to push on the switch. this would help with any misalignment due to the stalk keeping the dpad up and the sphere moving the dpad a bit. An even better solution would be to have the bottom of the dpad be curved as well, as seen in the diagram adetko posted.
For your print use a larger fill % or at least have thick walls. You don’t want the stalk or, especially the sphere have any give.
You also might want to sand/polish the sphere to let it move more smoothly if your prints end up textured.
It would be awesome if we had exact measurements of the switches, gap between them and the dpad (maybe @jonne will come to the resque?). From that I could probably model this on my end.
3 Likes
I hear you. I am very busy with helping out with new shipments but I promise to put the measurement drawings up.
2 Likes
No worries. We will eventually crack it. Shipments come first.
1 Like
Came to think about it.
A small rubber stalk that collapses slightly is probably the answer you and @eried are looking for.
A hard piece of plastic will not behave the way you want.
What I could do in the future is to make a silicon mold for such a part and then the users can either use it or not.
2 Likes
A solid rubber stalk would be perfect (as it will bend in the middle more than it would shrink vertically, basically solving the problem for a vast majority of user clicks).
It seems you can buy rubber kits for in-home molding. I never worked with rubber, but I bet we can find some type of kit that will be strong and flexible enough.
1 Like
Take an eraser, a knife and cut.
2 Likes